
On this page15 sections
Most beginner advice gets vlogging backwards. It tells you to buy a camera, pick a niche, and “just start filming your day,” as if the hard part were pressing record. The hard part is building a format you can repeat, then using every upload to learn what keeps people watching.
That matters because vlogging isn't a tiny hobby corner anymore. YouTube still sits among the biggest attention markets, with over 5 billion videos watched per day and more than 44% of internet users reportedly watching vlogs every month (vlogging statistics). In a market that crowded, the creators who last aren't the ones with the fanciest gear, they're the ones who can publish, study the response, and sharpen the next video.
Why Most Beginner Vloggers Quit and How to Avoid It
New vloggers usually quit for a boring reason. They treat every upload like a one-off project instead of a system they can repeat. That means each video starts from zero, with fresh decisions about the hook, the shots, the edit, and the title. It gets tiring quickly, especially when the first few uploads do not pull much response.
A stronger starting point is a format you can run again with small adjustments. Creator guidance and industry tracking both point toward the same habit, watching what holds attention across topic, thumbnail, length, and retention, then changing one part at a time (vlogging statistics). That is the core work. You publish, compare, and keep the pieces that hold viewers.
Practical rule: your first job is not to “find your voice,” it is to build a video shape that lets your voice show up without rebuilding the whole process every week.
The usual “film your whole day” advice creates another problem. It produces hours of footage with no clear payoff, so the edit turns messy and the finished video feels unfocused. A short-form-first workflow works better for beginners because it forces you to think in moments, not in blocks of time. You capture the strongest moments first, then repurpose them into clips, instead of hoping a long recording will somehow become a good video on its own. If you want a useful contrast with faceless formats, the guide to faceless TikTok content shows how structure can carry attention even without a strong on-camera personality.
That approach also makes your early analytics easier to use. Transcript analysis shows where people drop off, which phrases create momentum, and which sections need to be cut or shortened. Modular clips make that work practical, because a strong opening, a useful middle beat, and a clear payoff can each live on their own in short-form posts. One outing can become a full vlog, several shorts, and a better script for the next shoot.
The point is not to avoid long-form forever. The point is to start with a workflow that lowers friction and gives you feedback fast. Film one outing, pull the strongest moments, review the transcript, and use each upload to learn something concrete about hooks, pacing, and retention.
Choosing a Niche and Repeatable Format

A good niche sits at the overlap of three things, audience interest, your own energy, and a format you can repeat. If any one of those is missing, the channel usually stalls. People either can't find the topic, can't feel your commitment, or can't predict what kind of video they're getting.
Pick the format before you obsess over the topic
Five vlog archetypes work especially well because they're easy to repeat and easy to clip:
- Challenge vlog. Good when your audience wants progression, stakes, or a clear before-and-after.
- Day-in-the-life. Strong for personality-led content, especially when the day has a repeatable structure.
- Tutorial hybrid. Useful if you naturally explain what you're doing while showing it.
- Travel micro-doc. Works when the location itself creates visual variety.
- Opinion piece. Best when your voice or perspective is the reason people watch.
A format matters because it sets expectations. If viewers know the shape of the video, they can settle in faster. That helps both long-form and short-form, since a clear opening, a middle with movement, and a closing payoff all translate cleanly into clips.
Leave room for evolution without starting over
Over-niching happens when the topic box gets so tight that you run out of things to say. The fix isn't to stay broad, it's to keep a stable frame and let the subject move inside it. For example, a creator can stay inside “city life” while shifting from cafe visits to commute routines to neighborhood opinions.
A simple way to pressure-test a niche is to ask three questions:
- Can I make at least several videos without forcing ideas?
- Can I turn parts of this into short clips later?
- Will the audience understand what kind of creator I am after one video?
The answer doesn't need to be perfect on day one. It just needs to be repeatable enough that your next upload isn't a blank page.
Building Your Starter Equipment Kit

A smartphone-first setup is still the cleanest way to begin. Independent beginner guides recommend starting with what you already own, then adding stability, audio, and light as needed, using natural light, a tripod or gimbal, and an external mic when possible (step-by-step vlogging guide). That order makes sense because poor audio and shaky footage usually distract faster than a modest camera sensor does.
The upgrade sequence that actually helps
The smartest purchase order is usually audio first, then stabilization, then lighting, then a better camera body. That matches what early vloggers run into in the world. If you can't hear someone clearly or follow the frame without motion sickness, extra resolution won't rescue the video.
A useful budget-oriented reference point is the DigiDevice budget vlogging guide, which sits in the same practical lane as most starter setups. The point isn't to buy a full kit immediately. It's to make each purchase solve a visible bottleneck, not just look like progress on a shopping list.
Here's the lean version of the kit:
- Smartphone you already have. Start here unless you've already hit a specific limitation.
- Basic tripod or mount. Stability changes the feel of a vlog more than most beginners expect.
- Clip-on microphone. Clear voice recording helps the viewer stay with you.
- Simple ring light or natural light. Consistent light makes even basic footage easier to watch.
The one trap to avoid is buying for identity instead of output. A camera doesn't make you consistent. A repeatable setup does. The easier your kit is to grab, use, and put away, the more likely you are to publish again next week.
Filming Techniques for Engaging Vlog Footage
A lot of beginner footage fails because every shot has the same distance and the same energy. The fix is to film each scene in wide, medium, and close-up versions, so the edit has enough variety to feel alive. That technique works even if you're only using one phone, because you're creating editorial options, not collecting random clips.
A real-world public filming setup
A good first public vlog isn't shot in the middle of the busiest spot you can find. It starts in a low-pressure place, like a quiet cafe corner, a calmer market aisle, or an outdoor bench where you can get comfortable with being seen. Recent creator guidance also points beginners toward small, low-pressure locations before crowded public spaces, and that's the right order because confidence grows faster when the stakes stay low (public vlogging discussion).
Start with a place where you can reset if a shot feels awkward. Don't make your first outing a test of nerves and filming skills at the same time.
Inside that setting, keep your movement simple. Walk a few steps, stop, speak, cut away to detail shots, then resume. Recording in small segments instead of one long take makes reshoots easier and gives you cleaner edit points, which is exactly why experienced creators cut scenes into short bursts rather than one continuous monologue (three-focal-length workflow).
A few practical habits help immediately:
- Open with motion or action. A hand picking up coffee, a door opening, or a street sign creates context fast.
- Capture ambient details. Menu boards, shoes on pavement, or your desk setup can carry the story between talking points.
- Keep each sentence tied to a visual change. If nothing in the frame changes, the viewer feels it.
That same discipline shows up in more general retention advice too, which is why it's worth comparing your shot rhythm to what keeps attention in short-form and long-form alike. A useful external reference for that mindset is the article on what makes videos go viral.
Editing and Repurposing for Short-Form Platforms
The old edit-first mentality wastes too much good footage. A better workflow starts with a transcript, then turns one recording session into multiple outputs. That's where short-form-first vlogging becomes efficient, because the same raw material can produce a YouTube upload, a Reel, a Short, and a few tighter clips without re-filming the core story.
Build the edit around the transcript, not the timeline
Tools like TransClipper fit naturally here. It provides instant transcripts for TikTok, Instagram Reels, and YouTube Shorts across 50+ languages, and it can analyze hook segments, narrative structure, CTA detection, and an overall viral score. For a new vlogger, that kind of breakdown helps you see where the opening stalls, where the story twists, and where the call to action lands.
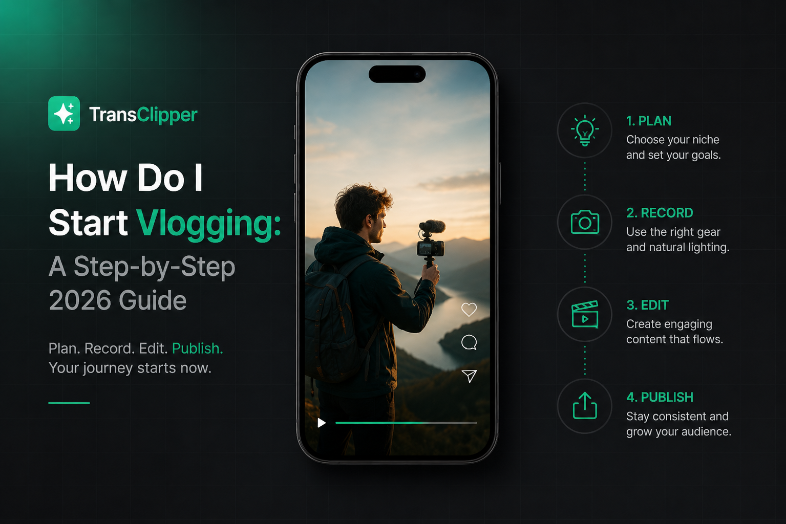
The core structure still stays simple, hook, body, CTA. The difference is that you now treat each vlog as a set of modular units. One segment might become the long-form intro, another becomes the strongest short clip, and a third becomes a captioned teaser. That's a lot more efficient than editing one video, posting it once, and hoping it finds its audience.
If you want a practical place to organize finished videos as a public-facing gallery, the showcase work with own.page resource is a clean example of how creators can present video content in a browsable way.
Useful habit: after editing, read the transcript out loud and ask whether the first sentence earns the second one. If it doesn't, the hook is probably too soft.
The repurposing part matters just as much. One filming session should give you at least one main upload plus a few cutdowns for TikTok, Reels, and Shorts, each trimmed for platform-specific attention spans. To keep the workflow organized, the TransClipper repurposing tool can be used as one option for turning a single transcript into multiple content angles.
Captions close the loop. They help accessibility, add searchable text, and give each clip another layer of context. For new vloggers, that's not cosmetic, it's distribution.
Publishing Strategy and Data-Driven Iteration

Publishing only works if the schedule matches what you can produce. A weekly plan you can repeat is better than an ambitious cadence you abandon after two uploads. For a beginner, that matters because consistency teaches more than short bursts of effort ever will.
Review the right signals
Early on, pay attention to average view duration, click-through rate, and retention curves. Those numbers show whether people clicked, stayed, and kept watching through the middle. Keep the first ten uploads simple to compare side by side, then look for patterns in topic choice, thumbnail style, video length, and drop-off points. That kind of comparison is the practical side of vlogging statistics, because it helps you see what viewers respond to instead of guessing.
Transcript review matters just as much. After each upload, read the transcript and mark the moments where the pacing slows, the point gets buried, or the opening takes too long to reach the reason to keep watching. That gives you a cleaner edit on the next vlog, and it also shows which lines are strong enough to become short clips.
The monetization milestone matters too, even if it is not the immediate goal. YouTube's Partner Program benchmark is 1,000 subscribers plus 4,000 watch hours, or 10 million Shorts views before earnings through the program can begin (creator guidance summary). Treat that as a planning marker. It explains why the early channel stage should focus on watchability, format fit, and repeatable output before revenue enters the picture.
Use competitor patterns without copying them
Competitor research should focus on mechanics, not mimicry. Compare the hook styles, thumbnail contrast, and video lengths used by channels in your niche across the same time period. Then ask which elements keep showing up. Repetition usually means the audience recognizes that format quickly.
A good companion read for broader short-form thinking is TikTok content strategy for hook design and retention, because the same questions about opening strength, watch time, and clipping apply across platforms. The point is not to copy TikTok wholesale. It is to use those habits to sharpen your vlog structure and shorten the time between recording and useful feedback.
If you want a simple publishing loop, keep it tight:
- Publish on a day you can sustain.
- Check how the first version performed after a short window.
- Adjust one variable next time, not five.
- Keep the format stable long enough to learn from it.
That loop turns vlogging from guesswork into a habit with feedback built in.
Your First Ten Vlogs Action Plan

The first ten videos are not the payoff, they're the apprenticeship. Your goal is to get enough repetitions to see what style, pace, and topic fit your audience and your energy. That means every upload should have one job, and that job should be clear before you hit record.
A clean ten-video progression
- Week 1. Lock your niche and repeatable format.
- Week 2. Assemble the starter kit and test your recording setup.
- Week 3. Outline the first vlog with a simple hook-body-CTA shape.
- Week 4. Film in short segments and capture wide, medium, and close-up shots.
- Week 5. Edit the first long-form cut and extract short clips.
- Week 6. Publish, then note where viewers seem to drop off.
- Week 7. Make one deliberate change to the hook or opening.
- Week 8. Try a second location or subject within the same format.
- Week 9. Tighten your captions, thumbnails, or closing CTA.
- Week 10. Review the first ten uploads as a set and decide what stays.
That cadence keeps the learning visible. If one video lands better because the opening is faster, the next one should test that. If another performs better because the story is cleaner, hold onto that structure and keep it.
A lot of beginners get discouraged by low early view counts. That reaction is normal, but it's usually the wrong scoreboard. Early growth comes from format clarity and repetition, not from hoping a single upload saves the channel.
The simplest checklist for each video is this, plan a hook, film in segments, edit from the transcript, publish on schedule, review the response, then make one improvement. Do that ten times and you'll have a real starting point, not just a folder full of unfinished ideas.
If you want a faster way to study hooks, transcripts, and short-form structure before your next upload, try TransClipper. It's built to turn TikTok, Reels, and Shorts into transcripts and structured analysis, which makes it easier to repurpose footage and improve each vlog with real pattern feedback instead of guesswork.


